As a violinist, you know that the heart and soul of your instrument lies in its strings. Just like a singer's voice, your violin's strings need regular care and replacement to maintain their vibrant, enchanting sound. In this ultimate guide, we will take you on a journey through the process of changing your violin strings, ensuring that your instrument always sings its sweetest melody.
When to Replace Your Violin Strings
Before we embark on the string replacement adventure, let us discuss when it is time to give your strings a well-deserved retirement. Here are a few tell-tale signs:
– Dull or muffled sound, as if your violin has a cold
– Visible wear, fraying, or unraveling, like a tattered tapestry
– Difficulty staying in tune, as if your strings have a mind of their own
– Discoloration or rust on the strings, like the patina of age
– Strings feeling sticky or rough under your fingers, like a cat's tongue
If you notice any of these signs, it is time to bid farewell to your old strings and welcome a new set that will breathe life back into your violin.

Supplies You’ll Need
Before you begin, gather these essential tools for your string-changing quest:
– New set of strings (E, A, D, and G), the heroes of this tale
– String winder (optional but recommended), your trusty sidekick
– Fine tuner (if your violin has one), a helpful ally
– Soft cloth, to polish away the dust of adventures past
– Pencil, to mark the path ahead
– Peg compound (if needed), a magic potion for stubborn pegs
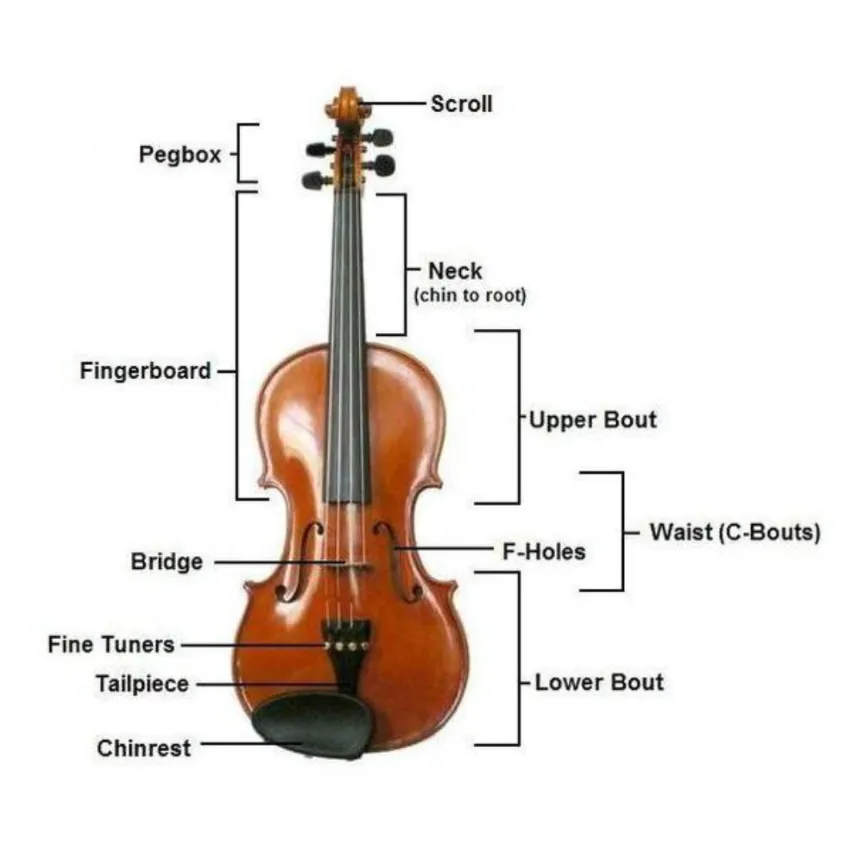
Parts of Your Violin

The String Materials Symphony
Violin strings come in various materials, each with its own unique voice in the orchestra of sound. Here is a brief introduction to the main players:
– Gut strings: The traditional choice, with a warm, rich tone that harkens back to the days of old. They are the wise elders of the string world, preferred by some period instrument performers.
– Steel core strings: The bright, projecting stars of the modern era. They are the divas of the string world, demanding attention and stealing the spotlight.
– Synthetic core strings: The versatile middle ground, offering a balance between warmth and projection. They are the quick-change artists of the string world, with a faster break-in time than their gut counterparts.
– Wound strings: The complex characters, with a core material wound with another metal, such as aluminum or silver. They add mass and depth to the string’s tonal properties, like a layered personality.
As you explore the world of strings, experiment with different brands and materials to find the combination that best suits your instrument and playing style. Each violin has its own unique voice, and it is up to you to find the strings that let it sing its truest song.
Removing the Old Strings and Installing the New
Removing the Old Strings

Before installing the new strings, you must remove the old ones. Follow these steps:
- Loosen the fine tuner (if applicable) and the peg until the string has enough slack to be unwound.
- Carefully unwind the string from the peg, making sure not to let it snap or recoil, which could damage your instrument.
- Remove the string from the bridge and the tailpiece.
- Repeat this process for all four strings.
Once you have removed all the old strings, take a moment to clean your violin with a soft cloth, removing any rosin dust or debris.
Installing the New Strings
Now that your violin is clean and string-free, it is time to install the new strings. Follow these steps for each string:
- Insert one end of the string into the tailpiece or fine tuner.
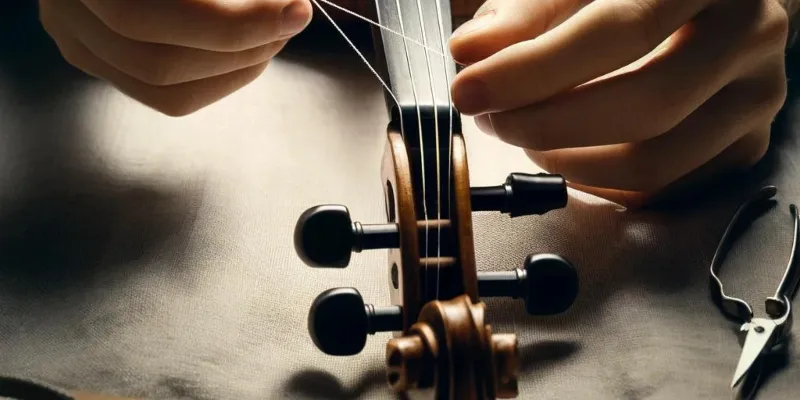
- Thread the other end of the string through the peg hole.
- If using a fine tuner, make sure the string is seated properly in the saddle.
- Begin winding the string around the peg, ensuring that each wind is neat and tight against the previous one.
- As you wind, keep the string taut and maintain even tension.
- Once the string is wound, use a pencil to mark where it crosses the bridge. This will help you ensure proper string placement.
- Continue winding until the string is in tune.
Repeat this process for all four strings.
Tuning and Stretching the New Strings
After installing the new strings, it is essential to tune and stretch them properly. New strings tend to stretch and go out of tune quickly, so be prepared to tune more frequently in the beginning.
Use a tuner or a reference pitch to bring each string up to the correct pitch gradually. As you tune, gently pull on the string to help it stretch. This process may take some time, so be patient and tune each string a little at a time to avoid overtightening.
Conclusion
Changing your violin strings may seem like a daunting quest at first, but with practice, it will become a rewarding part of your violin care ritual. By regularly replacing your strings, you will ensure that your instrument always sings its sweetest song and is a joy to play.
For a helpful video tutorial on changing violin strings, check out the resource available on Practicing Musician’s platform . As a company dedicated to providing comprehensive resources for violinists of all levels, Practicing Musician offers a wealth of knowledge to help you on your musical journey.
So go ahead, give your violin a “spa day,” and enjoy the satisfaction of playing on fresh, vibrant strings!


Leave A Comment
You must be logged in to post a comment.