Introduction
Picture this: you are about to walk on stage for an important performance, but as you tune your cello, you notice a dull, scratchy sound. A quick inspection reveals that your strings are caked with rosin and your bow hair is tangled and dirty. Every cellist's nightmare, right?
As a cellist, you know that your instrument is an extension of yourself. Its rich, warm tones and expressive range let you convey emotion and artistry in a unique way. However, to keep your cello sounding its best and prevent damage over time, regular cleaning and maintenance are essential. In this step-by-step guide, we will walk you through the process of thoroughly cleaning your cello's body, strings, and bow hair, so you can enjoy its full potential for years to come.

Gathering Your Supplies
Before diving into the cleaning process, make sure you have the following supplies on hand:
– Soft, lint-free cloths (microfiber works well)
– Mild soap (unscented dish soap or special instrument cleaner)
– Polish specifically designed for stringed instruments
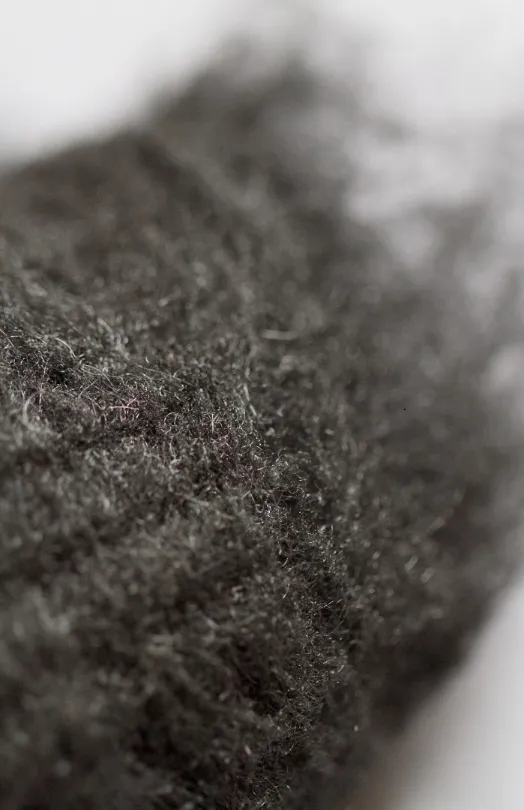
– Fine steel wool (grade #0000)
– Soft-bristled toothbrush
– Rosin remover or alcohol-based cleaner
– Bow hair comb

Cleaning the Cello Body
Start by gently wiping down the entire cello body with a soft, dry cloth to remove any dust or rosin buildup. Pay special attention to the area around the bridge and f-holes, where rosin tends to accumulate.
Next, dampen one of your cloths with a small amount of mild soap and lukewarm water. Wring out the cloth thoroughly so it is just slightly damp. Gently clean the cello body, taking care not to let any excess moisture seep into the f-holes or under the tailpiece. Dry the instrument immediately with a separate lint-free cloth.
For tougher rosin spots, use a small amount of fine steel wool (grade #0000) to gently buff them out. Be sure to follow the grain of the wood to avoid scratches. If you are unsure or nervous about using steel wool, consult with a professional luthier first.
Finally, apply a thin coat of instrument polish to the cello body using a soft cloth, following the manufacturer's instructions. This will help protect the wood and keep it looking shiny and new. Remember, a little polish goes a long way – you do not want your cello to look like it has been dipped in a vat of oil!
Cleaning the Strings
Over time, cello strings can accumulate dirt, oil, and rosin, which can affect their sound quality and playability. To clean your strings, start by gently wiping them down with a soft, dry cloth. For a more thorough cleaning, use a small amount of alcohol-based cleaner or rosin remover on a cloth and carefully wipe each string from end to end. Be sure not to get any cleaner on the cello body or varnish.
If there is stubborn buildup between the strings and fingerboard, use a soft-bristled toothbrush to gently scrub the area. Take care not to apply too much pressure, as this can damage the strings or fingerboard.
So how do you know when it is time to replace your strings altogether? A good rule of thumb is to change them every 6-12 months, depending on how frequently you play. Signs that your strings need replacing include a dull or muffled sound, difficulty staying in tune, and visible wear or fraying. When in doubt, consult with your teacher or a professional luthier.
Maintaining the Bow Hair
Your cello bow hair also requires regular cleaning and maintenance to perform its best. Start by gently combing through the hair with a bow hair comb to remove any tangles or clumps of rosin.
Next, use a soft cloth dampened with a small amount of alcohol-based cleaner or rosin remover to wipe down the bow hair from the frog to the tip. Be careful not to get any moisture on the bow stick or frog, as this can damage the wood or loosen the hair. Think of it like shampooing your own hair – you would not want to get soap all over your scalp and face, would you?
After cleaning, check that the bow hair has the proper tension. The hair should be tight enough to maintain a slight curve in the bow stick when fully tightened, but not so tight that the stick is straight or bowing inward. To adjust the tension, simply turn the screw at the end of the bow in small increments until you achieve the desired tension. It may take some trial and error to find the sweet spot, but your bow will thank you for it!
Proper Storage and Maintenance Habits
In addition to regular cleaning, there are a few storage and maintenance habits that can help keep your cello in top condition:
– Always loosen the bow hair after playing to prevent stretching or damage
– Store your cello in a hard case with a humidity control system to protect against temperature and moisture fluctuations
– Wipe down your cello and strings after each playing session to remove rosin buildup
– Have your cello professionally set up and adjusted at least once a year
But what if, despite your best efforts, you notice a scratch or ding on your cello during cleaning? Do not panic! Small surface blemishes can often be touched up with a bit of instrument polish or wax. For more severe damage, it is best to take your cello to a professional luthier for repair.
Conclusion
By following these step-by-step instructions for cleaning and maintaining your cello, you will ensure that it stays in excellent condition and produces the best possible sound. Regular care not only extends the life of your instrument but also allows you to develop a deeper connection and appreciation for your cello.
At Practicing Musician, we are committed to helping cellists of all levels develop their skills and care for their instruments. Our online cello lessons, taught by experienced professionals, cover a wide range of topics, from basic technique to advanced repertoire. We also offer detailed tutorials on cello maintenance, including how to change strings, adjust the bridge, and more.
For a helpful visual guide on cleaning your cello, check out this video from cellist Levi Clay: Getting to Know Your Cello: Cleaning Your Cello
As part of our mission to make high-quality music education accessible to everyone, all our lessons are available online, anytime, anywhere. Whether you are a beginner just starting out or an experienced cellist looking to refine your skills, Practicing Musician has the resources you need to achieve your goals and become the best musician you can be.
So, grab your cleaning supplies, tune up your cello, and get ready to make some beautiful music!
Check out: Mastering Cello Bow Tension: A Comprehensive Guide to Tightening Your Bow for Optimal Performance


Leave A Comment
You must be logged in to post a comment.